0x01 前言
接触docker已经有一段时间,使用着Rancher2.0来管理Kubernetes集群。在刚接触不久我就将博客迁移到其中,至今已经有大半年的时间。
因为工作的关系,没有持续深入学习,只能按需学习,至少目前是正常的。除博客以外,我所有的服务均已实现容器化,今天先记录博客中间件的配置方式,后续还需要进一步提升可靠性和学习如何实现灾难恢复。
0x02 准备
首先,我博客使用Wordpress和商业主题搭建的,而我喜欢使用NMPA架构,也就是nginx、mariadb、PHP-FPM和apache,这些组件的主要功能如下:
- nginx:反向代理、WAF、抗CC、重写等
- mariadb:数据库,多主集群
- PHP-FPM:PHP解析器
- apache:与PHP-FPM通讯,重写、其他安全配置、使用mod_pagespeed
在容器里这些东西也是少不了的,所以需要自行构建docker镜像。受限于自身水平,构建出来的镜像太庞大,因此没有撰写相关文章。这些中间件的dockerfile可以在以下地址中找到:
当然,还可以在dockerhub中找到:
gitlab-ci.yml和build.sh的代码也可以在我的gitlab中找到。
如果你不是专业的docker玩家,还需要准备一套Rancher2.x环境以便依照以下内容逐步操作:
0x03 配置文件
在配置使用之前可以看看我编写的dockerfile,这样才能了解需要哪些配置文件,如果不想麻烦,基本需要以下文件:
- nginx
- nginx.conf
- modsecurity.conf,不使用WAF的话可以忽略该文件
- modsec_include.conf,不使用WAF的话可以忽略该文件
- modsecurity规则白名单,不使用WAF的话可以忽略该文件
- 虚拟主机的配置文件
- 数字证书
- PHP-FPN
- php-fpm.conf
- www.conf
- php.ini
- apache:
- httpd.conf
- 虚拟主机的配置文件
因为运行的是Wordpress,所以会涉及到数据持久化,主要提供给PHP-FPM和apache。如果是静态文件,则apache会直接响应,而php文件则会交由PHP-FPM处理,这两个步骤都需要读写文件。另外,如果使用mod_pagespeed,也需要让apache能访问静态文件。还有一个需要实现数据持久化的是日志,包括访问日志、错误日志和WAF的日志。
0x03.1 nginx配置文件
这部分内容我在之前的文章中有详细说明,可以尝试使用站内搜索功能进行搜索。目前使用的配置文件片段如下:
server {
  listen                     80;
  server_name                backend.ngx.hk;

  access_log                 /var/log/nginx/access.log main;
  include                    /usr/local/nginx/conf.d/sub.filter;

  index                      index.php index.html;

  proxy_redirect             https://ngx.hk https://ngx.hk;

  proxy_hide_header          X-Powered-By;
  proxy_hide_header          Vary;
  proxy_hide_header          Pragma;
  proxy_hide_header          Expires;
  proxy_hide_header          Last-Modified;
  proxy_hide_header          Cache-Control;
  proxy_hide_header          Set-Cookie;
  proxy_hide_header          link;
  proxy_hide_header          x-mod-pagespeed;
  proxy_cache_background_update on;

  proxy_set_header           Host ngx.hk;
  proxy_set_header           Accept-Encoding '';
  proxy_set_header           X-Real-IP $remote_addr;
  proxy_set_header           X-Forwarded-For $proxy_add_x_forwarded_for;

  modsecurity                on;
  modsecurity_rules_file     /usr/local/nginx/modsec_includes.conf;

  gzip                       on;

  set                        $proxy_no_cache 0;
  set                        $requestmethod GET;

  if ($http_cookie ~* "wordpress_logged_in_[^=]*=([^%]+)%7C") {
    set                      $wordpress_auth wordpress_logged_in_$1;
    set                      $proxy_cache_bypass 1;
    set                      $proxy_no_cache 1;
    set                      $requestmethod $request_method;
  }

  location ~ /\. {
    deny                     all;
  }

  location ~* /(?:uploads|files)/.*\.php$ {
    deny                     all;
  }

  location ~* ^/wp-login.php {
    proxy_pass               http://httpd.ngx-web:8080;
    proxy_pass_header        'Set-Cookie';
  }

  location ~* ^/(wp-admin|wp-cron.php|wp-comments-post.php) {
    proxy_pass               http://httpd.ngx-web:8080;
    proxy_pass_header        'Set-Cookie';
  }

  location ~ .*\.(js|css|jpg|jpeg|gif|png|woff|webp|ico|svg|ttf)$  {
    proxy_pass               http://httpd.ngx-web:8080;

    proxy_method             GET;

    proxy_ignore_headers     Set-Cookie Expires Cache-Control X-Accel-Expires;
    proxy_cache              off;
    proxy_cache_valid        200 304 301 302 180d;
    proxy_cache_use_stale    error timeout invalid_header http_404 http_500 http_502 http_504;

    modsecurity              off;
  }

  location / {
    proxy_pass               http://httpd.ngx-web:8080;

    proxy_ignore_headers     Set-Cookie Expires Cache-Control X-Accel-Expires;
    proxy_cache              content;
    proxy_cache_valid        200 304 301 302 1h;
    proxy_cache_use_stale    error timeout invalid_header http_404 http_500 http_502 http_504;

    proxy_cache_bypass       $proxy_cache_bypass;
    proxy_no_cache           $proxy_no_cache;
  }
}
这是提供给访客使用的边缘节点后的安全节点,主要提供WAF防护服务。这是配置文件的片段,有一些安全配置已经移除。有以下内容需要注意:
- server_name:一个二级域名,前面才是边缘节点
- proxy_redirect:我的后端使用http协议,所以需要修改header里的重定向
- proxy_hide_header:因为我这博客基本没有交互,所以隐藏了一些header,尤其是Cookie的部分
- modsecurity:请按需配置modsecurity
- proxy_pass:使用pod的名称和端口
因为我后端是http协议,所以有大量的内容需要替换,要不然浏览器会报mix content错误,根据我站点的特点,有以下配置:
sub_filter_types    *;
sub_filter_once     off;
sub_filter  'http://$host' 'https://$host';
sub_filter  'http:\/\/$host' 'https:\/\/$host';
sub_filter  'http://cdn.enginx.cn' 'https://cdn.enginx.cn';

sub_filter  'https://ajax.googleapis.com' 'https://ajax.enginx.cn';
sub_filter  'https://ajax.googleapis.com' 'https://ajax.enginx.cn';
sub_filter  '//ajax.googleapis.com' '//ajax.enginx.cn';
sub_filter  'http://ajax.enginx.cn' 'https://ajax.enginx.cn';

sub_filter  'https://fonts.googleapis.com' 'https://fonts.googleapis.com';
sub_filter  'https://fonts.gstatic.com' 'https://fonts.gstatic.com';

sub_filter  'https://i0.wp.com' 'https://i0.wp.com';
sub_filter  'https://i1.wp.com' 'https://i1.wp.com';
sub_filter  'https://i2.wp.com' 'https://i2.wp.com';

sub_filter  'parent=https' 'parent=httpss';

sub_filter  'https://stats.wp.com' 'https://stats.wp.com';
sub_filter  'http://widgets.wp.com' 'https://widgets.wp.com';
sub_filter  'http://www.bilibili.com' 'https://www.bilibili.com';

sub_filter  'https://ngx.hk' 'https://ngx.hk';
sub_filter  'https:\/\/ngx.hk' 'https:\/\/ngx.hk';
这个文件名为sub.filter,路径请留意上一个配置文件中的include部分:
include /usr/local/nginx/conf.d/sub.filter;
nginx的配置文件可以参考我博客中的其他文章,如果需要使用modsecurity,则需要include相关模块:
load_module /usr/local/nginx/modules/ngx_http_modsecurity_module.so;
其实这部分没什么特别的,使用平常的配置问价即可。
0x03.2 PHP-FPM配置文件
php的配置文件就比较简单了,首先需要调整php.ini中的时区:
[Date]
date.timezone = Asia/Shanghai
如果博客中安装有wordfence,还需要添加以下内容:
[HOST=ngx.hk]
auto_prepend_file = '/usr/local/html/ngx.hk/public_html/wordfence-waf.php'
php-fpm的主配置文件就一个global块:
[global]
include=/usr/local/php/etc/php-fpm.d/*.conf
最后是站点的配置文件,请根据实际情况调整:
[ngxhk]
listen = 0.0.0.0:9000
user = www
group = www
pm = dynamic
pm.max_children = 32
pm.start_servers = 8
pm.min_spare_servers = 8
pm.max_spare_servers = 16
php_admin_flag[log_errors] = on
php_admin_value[error_log] = /usr/local/html/ngx.hk/logs/fpm-php.log
php_flag[display_errors] = off
php_admin_value[memory_limit] = 1024M
pm.max_requests = 3000
request_terminate_timeout = 300
0x03.3 apache配置文件
httpd.conf稍微修改即可,但需要注意包含以下内容:
Include conf.d/*.conf
如果使用pagespeed,则需要准备pagespeed.conf,这部分内容请参考线上文档。还需要准备以下文件,主要用于配置相关文件夹的权限:
# 文件名
httpd-userdir.conf

# 内容
UserDir public_html

<Directory "/usr/local/html/*/public_html">
	AllowOverride All
	Options -Indexes +SymLinksIfOwnerMatch +IncludesNoExec
	Require all granted
	DirectoryIndex index.html index.php
</Directory>
最后准备虚拟主机的配置文件,因为安全关系,除主要的配置信息外,其他内容已删除:
<VirtualHost 0.0.0.0:8080>
  ServerAdmin [email protected]
  DocumentRoot /usr/local/html/ngx.hk/public_html/
  ServerName ngx.hk
  ProxyPassMatch ^/(.*\.php)$ fcgi://php-fpm:9000/usr/local/html/ngx.hk/public_html/$1
  ErrorLog /usr/local/html/ngx.hk/logs/apa.error.log
</VirtualHost>
0x04 Rancher
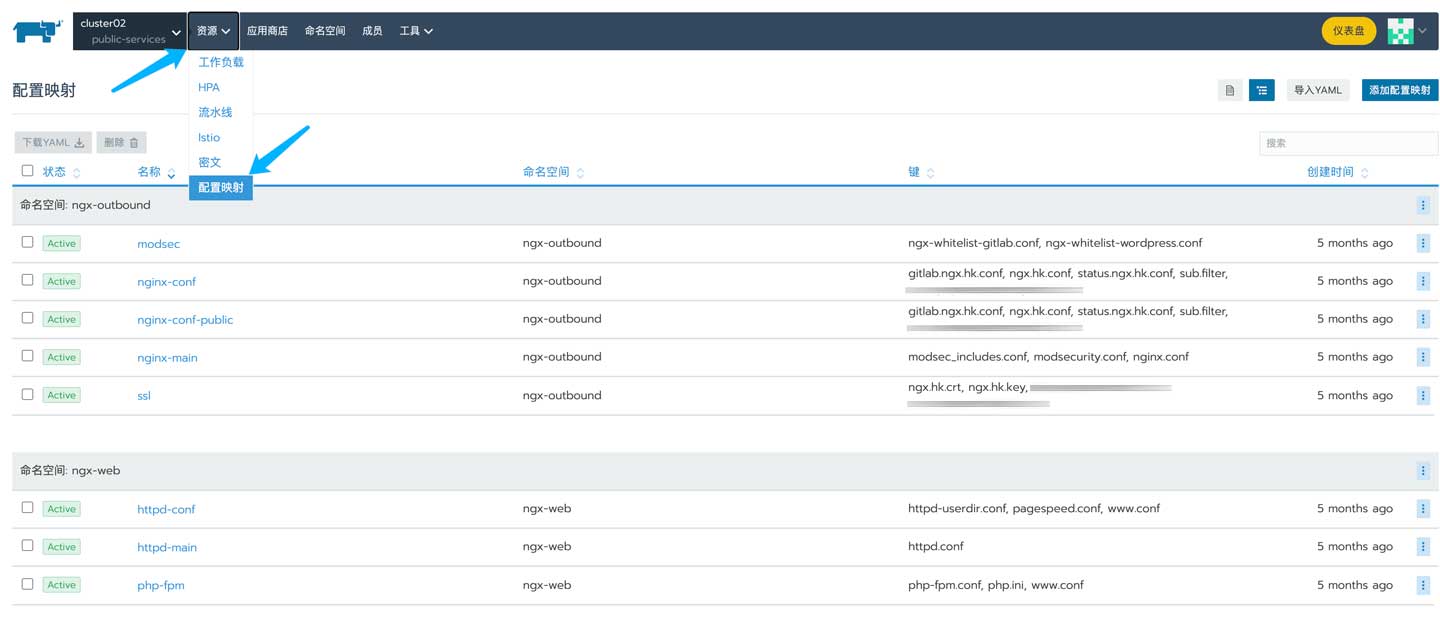
准备好所有配置信息后即可开始部署服务,首先添加配置映射:
分别将配置文件添加到指定位置,建议分门别类:
0x04.1 部署nginx
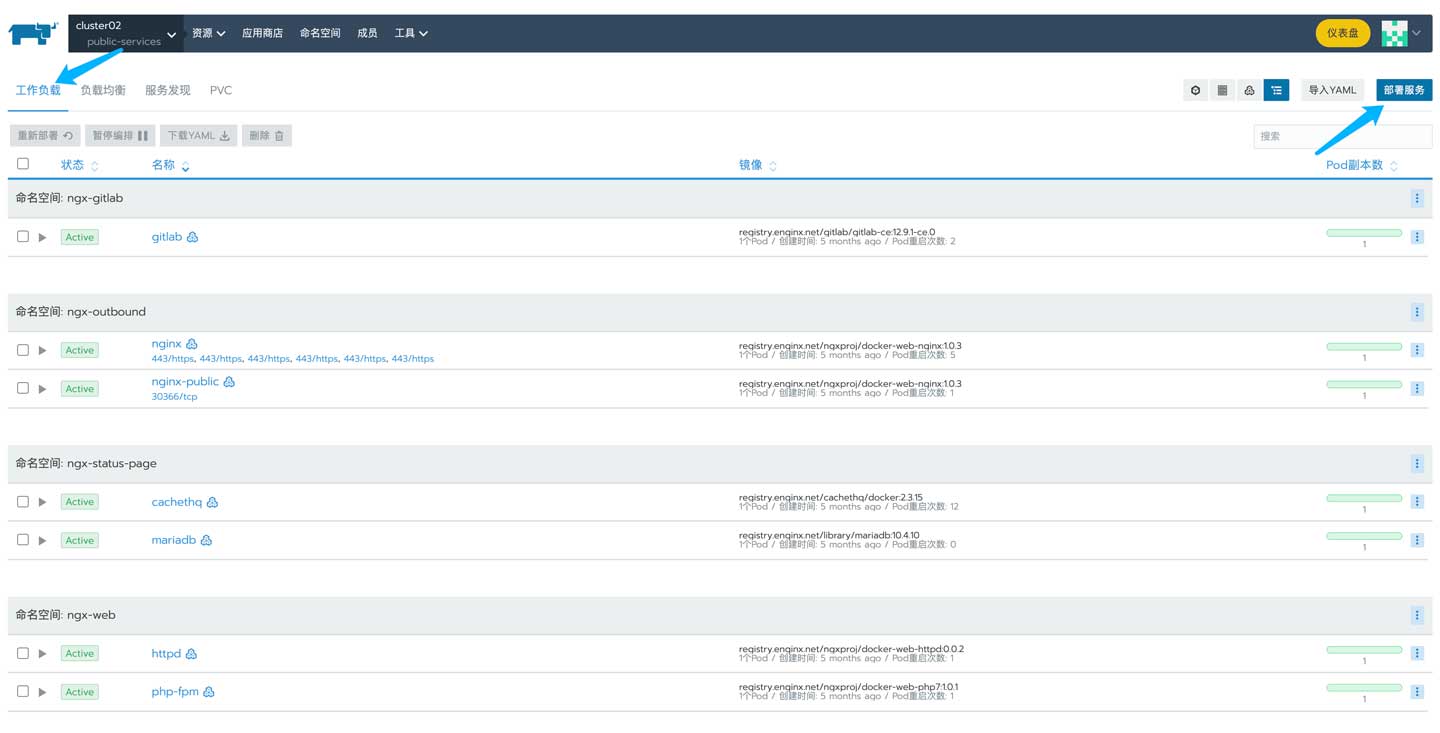
回到工作负载页面中,单击部署服务开始部署工作:
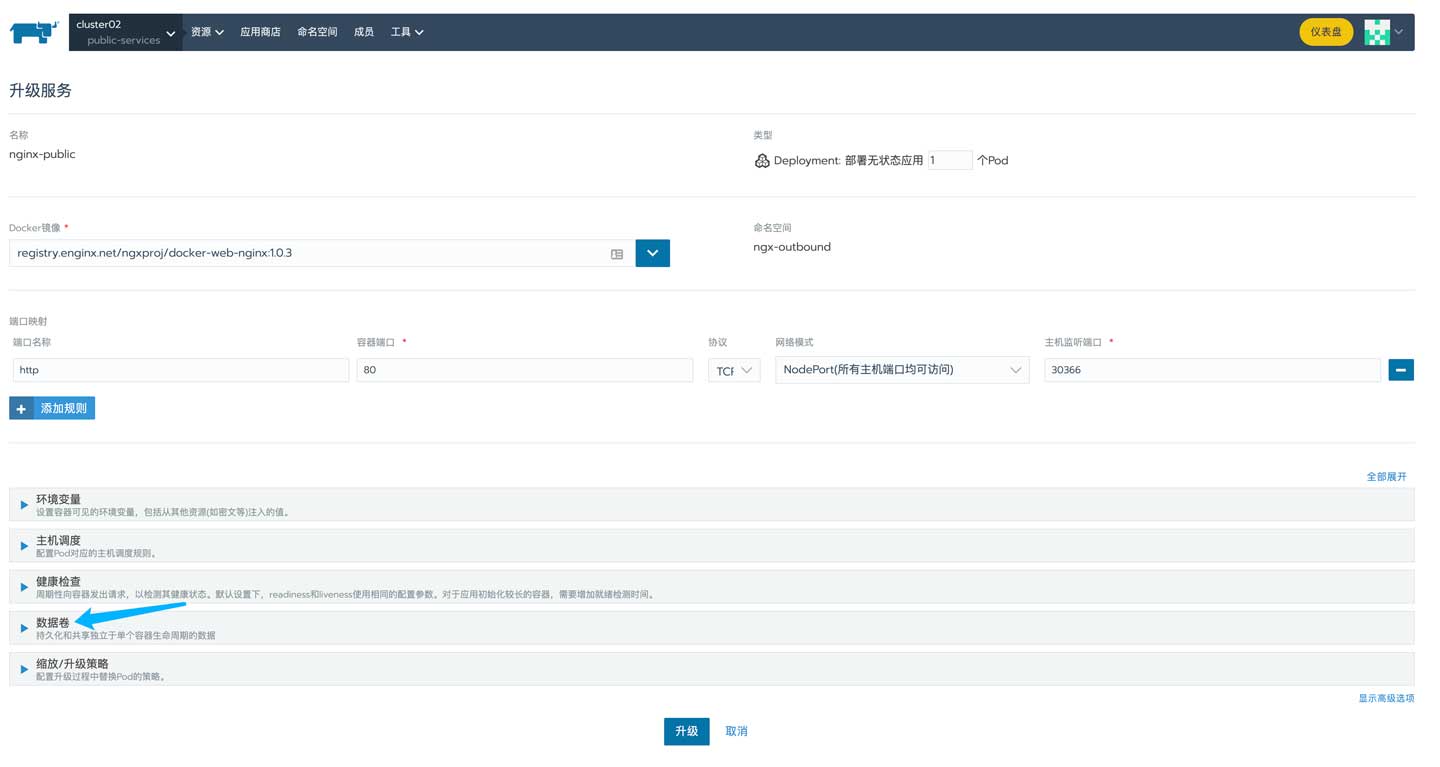
首先填写基本信息,如名称、使用的镜像、命名空间以及端口:
上图中的镜像使用着我本地搭建的docker镜像代理服务器,如果需要使用我构建的镜像,请移除仓库地址:
ngxproj/docker-web-nginx:1.0.3
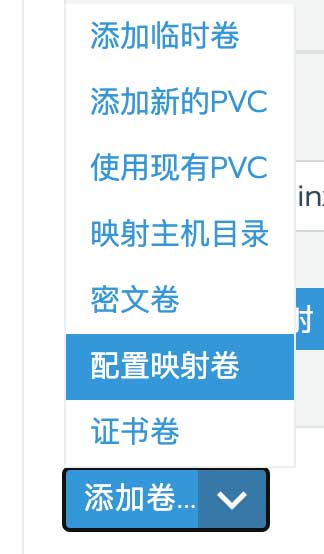
然后打开数据卷,单击新建配置映射卷:
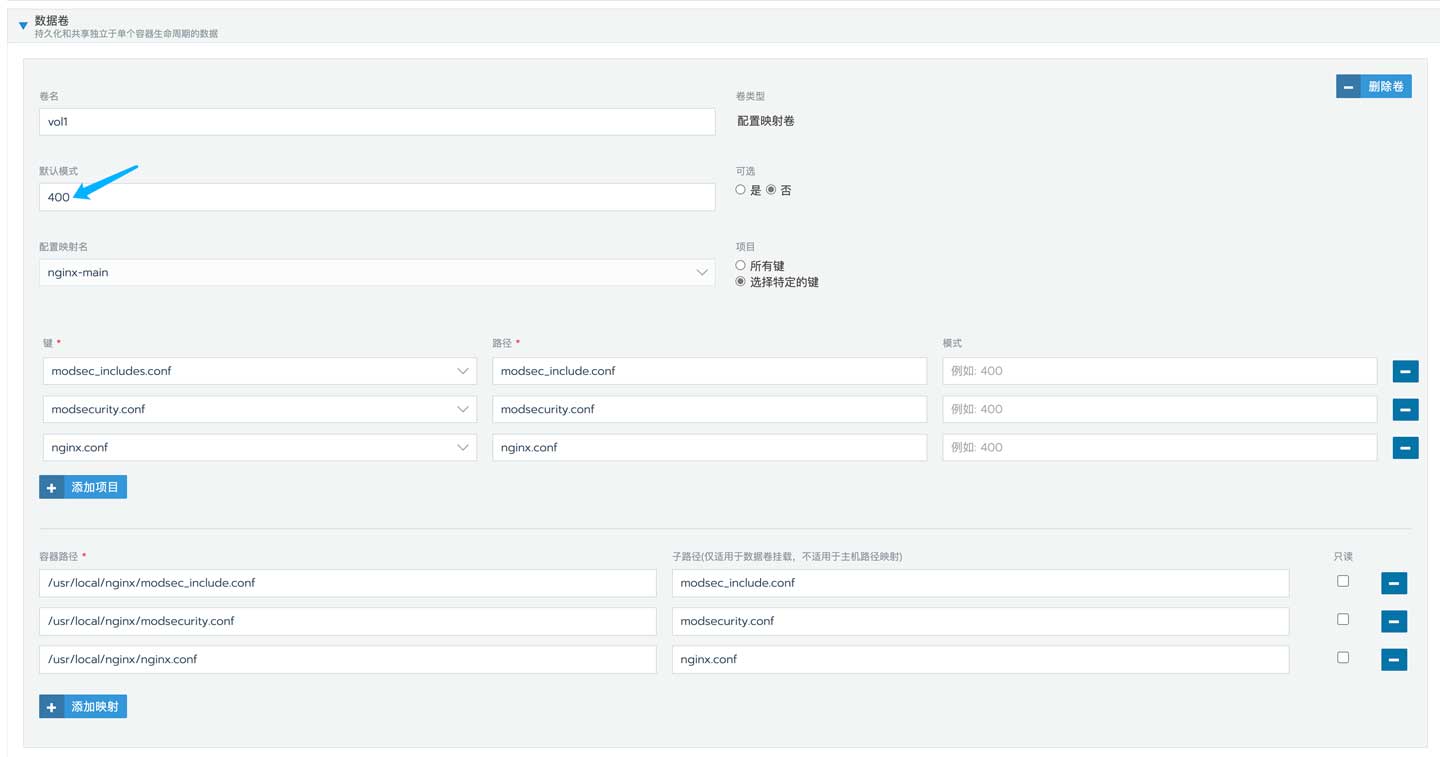
配置主要分为两种:一种是独立的文件,因为目标文件夹内还有其他文件,没法直接映射到目标,如nginx.conf;另一种是映射到空文件夹的文件,比如虚拟主机的配置文件和数字证书。
独立配置文件的映射比较繁琐,需要逐一配置:
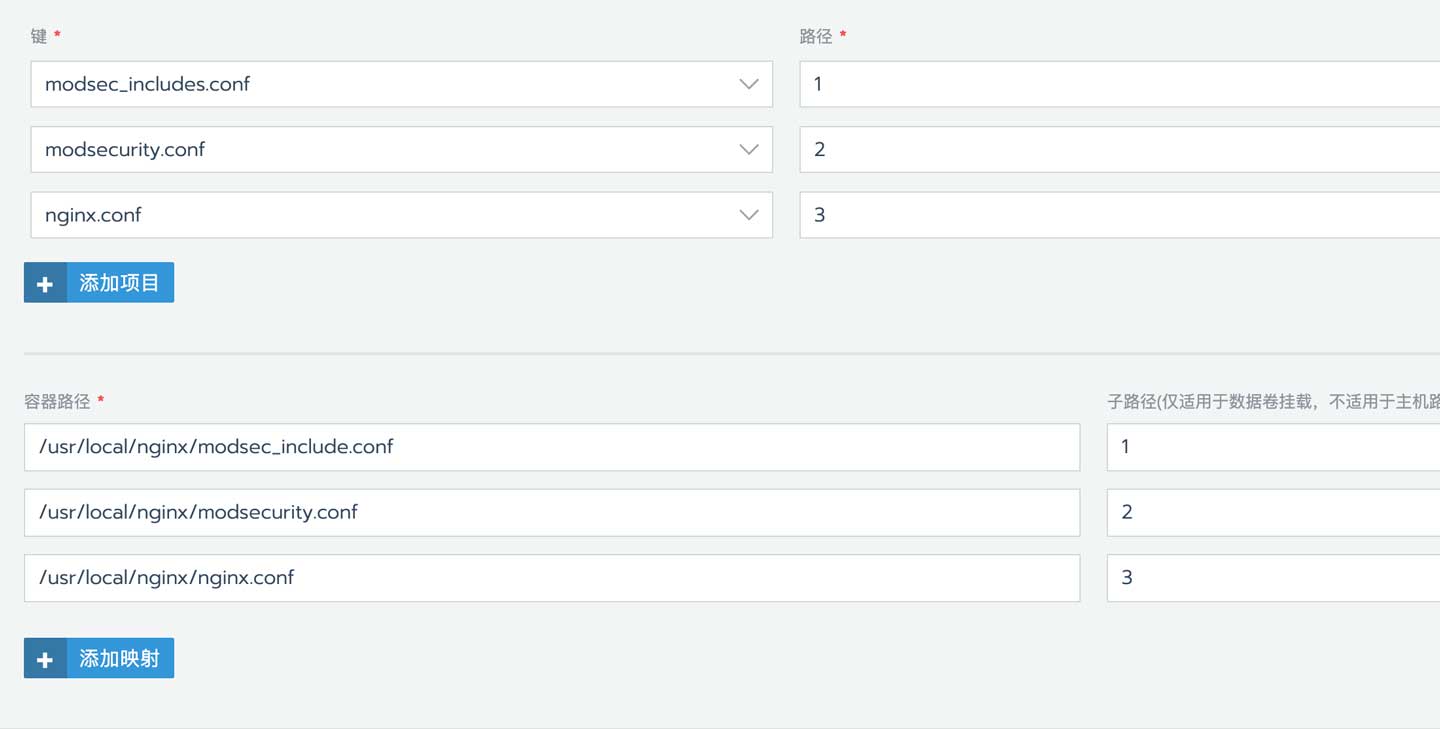
除了需要调整文件权限外,上图中的路径与子路径需要一一对应,而路径可以随意定义名称,容器路径则需要根据容器内部的配置和配置文件引用的路径进行配置:
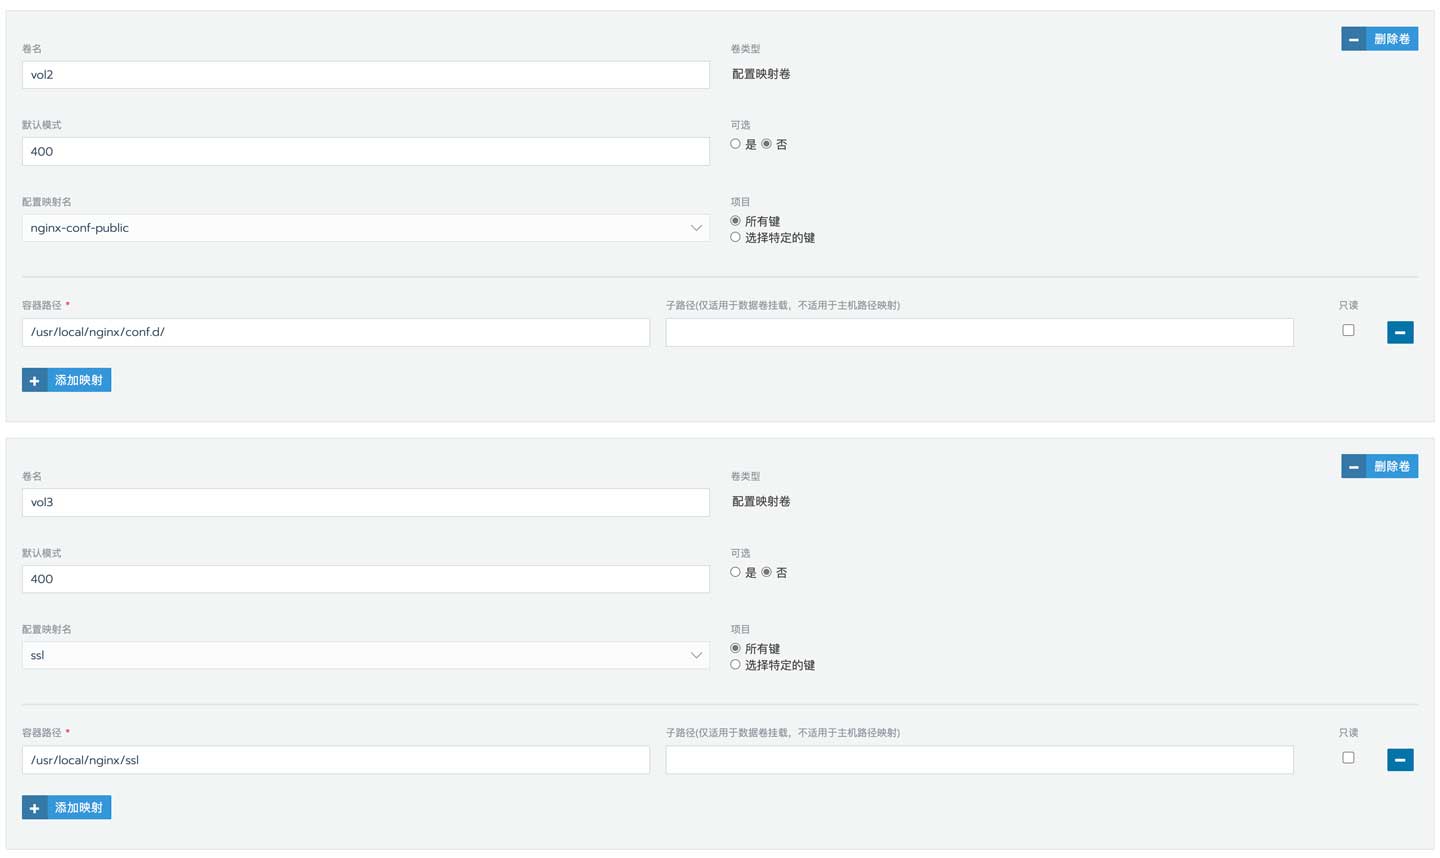
还有映射所有键的情况:
针对日志的持久化,则需要配置PVC,但PVC的配置不在本文中中说明,配置如下:
 我们经常会遇到需要重新部署容器的情况,比如更新配置文件后、容器假死或因为调度的需要,这时候可能因部署不成功而导致服务中断。为了避免这种情况的发生,需要配置最短准备时间,当容器正常运行指定的时间后才会将旧容器移除:
注意!一些服务不适用此配置,比如数据库。因为有pod正在运行的话会锁定一些文件,而新的pod因为无法取得相关权限而无法部署成功,需要根据实际情况选择策略。
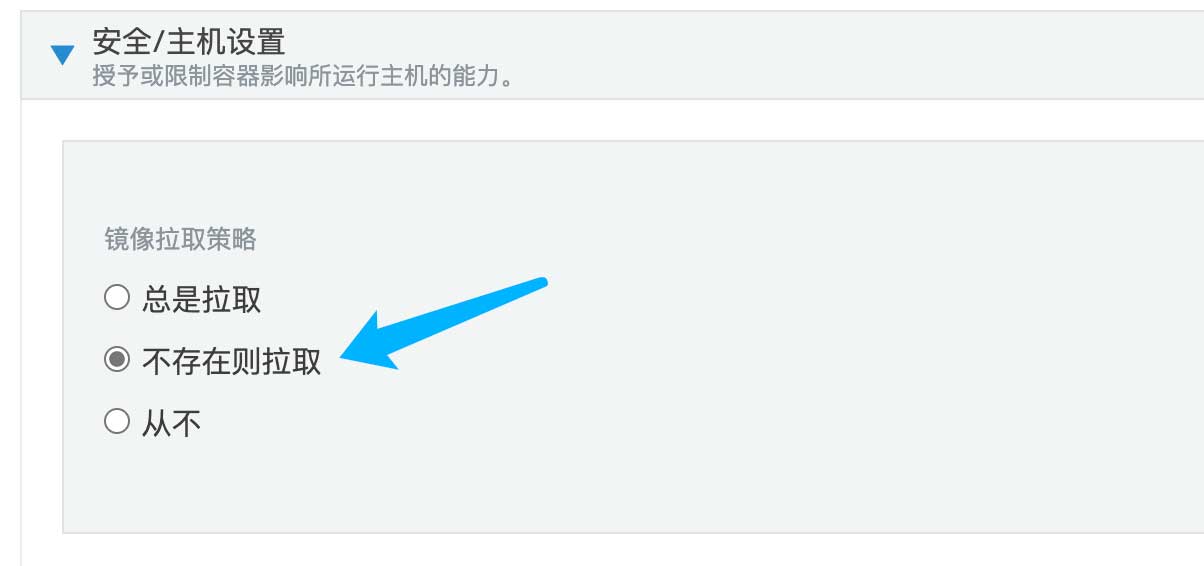
还有一个功能比较合适没有docker仓库代理服务器的情况:
如果每次都拉取镜像,对网络也是一个不小的挑战。
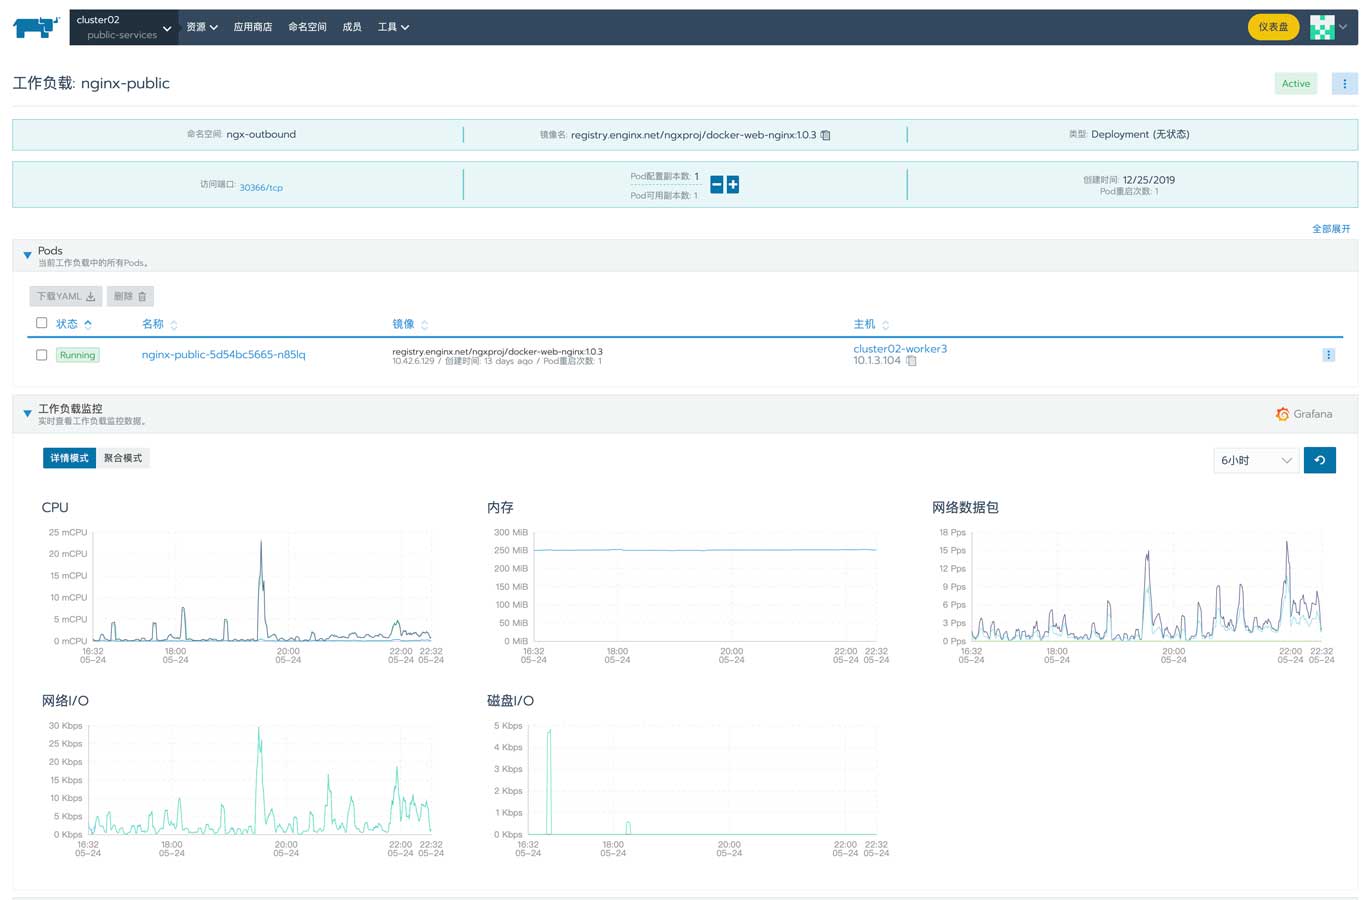
部署成功后即可检查服务状态:
0x04.2 部署apache
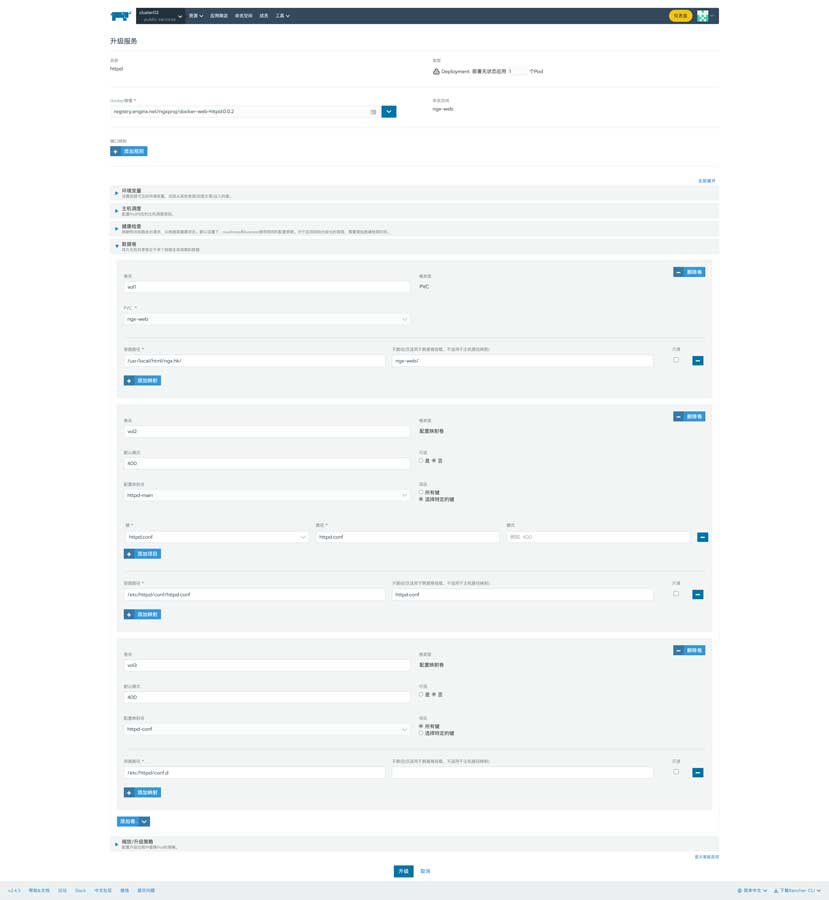
和部署nginx的过程类似:
唯一不同的是不需要映射端口,内部互联即可,并不需要对外提供服务。请注意这个pod的名称:httpd,这需要和nginx虚拟站点配置信息中的一致:
proxy_pass http://httpd.ngx-web:8080;
可以看到这类似一个域名,上述地址主要分为四部分:
- 协议:http
- pod名称:httpd
- namespace名称:ngx-web
- 端口:8080
其实在同一个集群内,不同命名空间的网络是相通的,而默认情况下不同项目间的网络也是相通的,除非有在建立集群的时候有配置禁止互通:
0x04.3 部署PHP-FPM
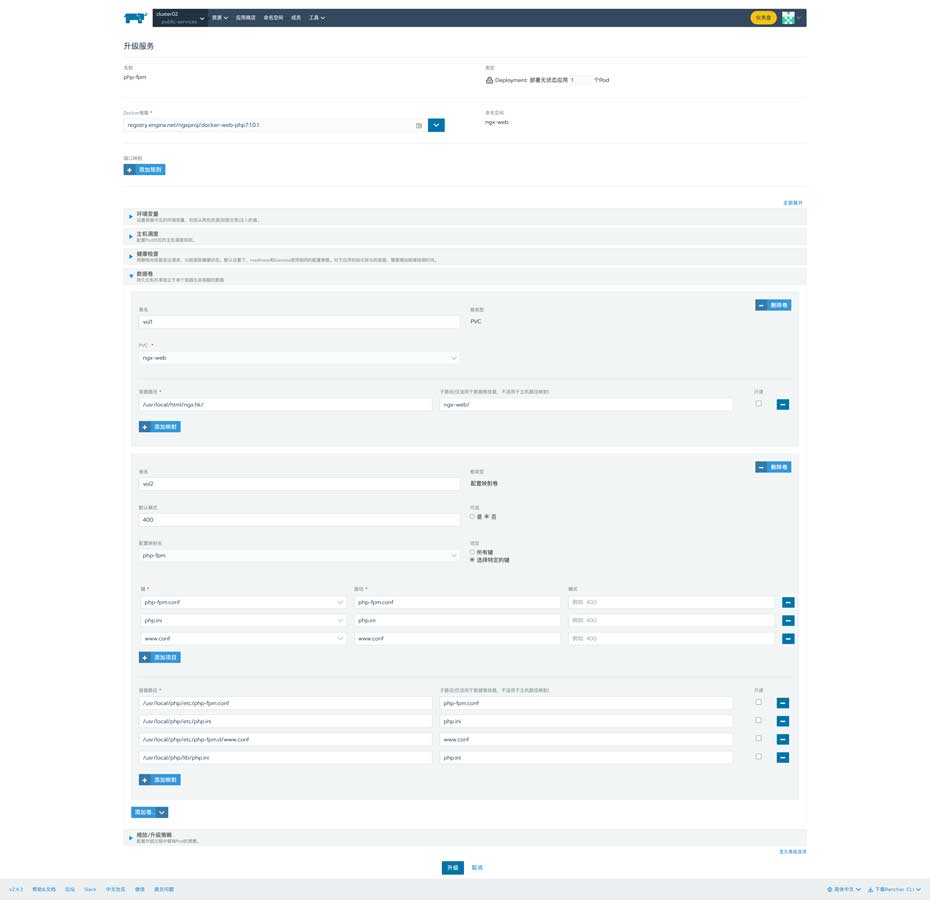
PHP-FPM的配置也非常简单:
0x05 负载均衡
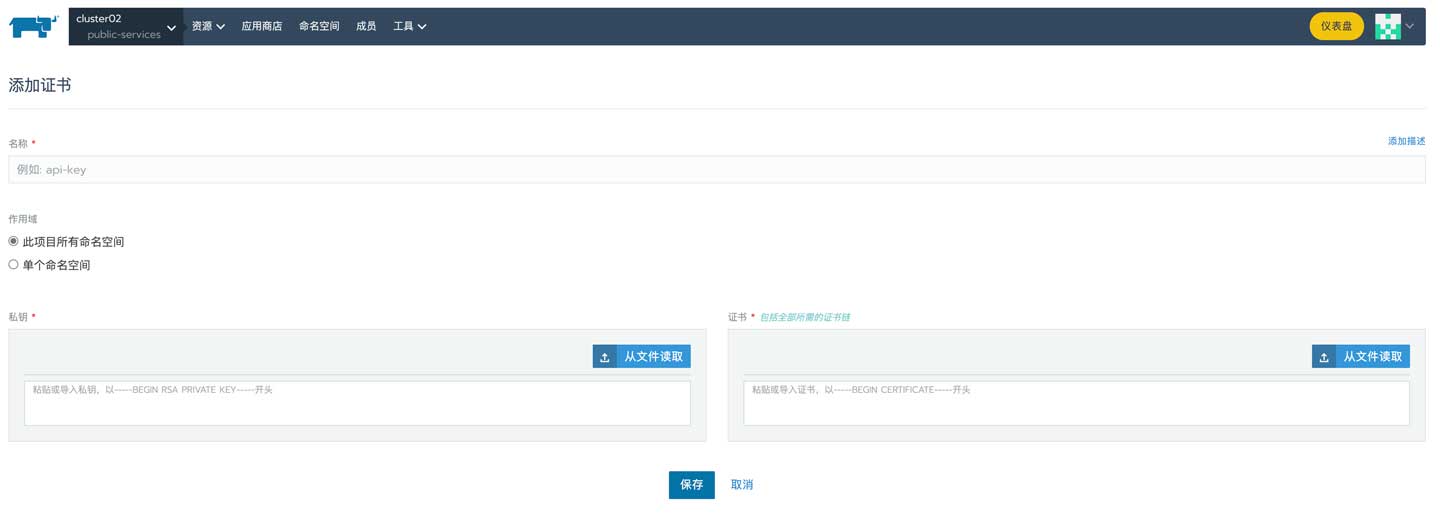
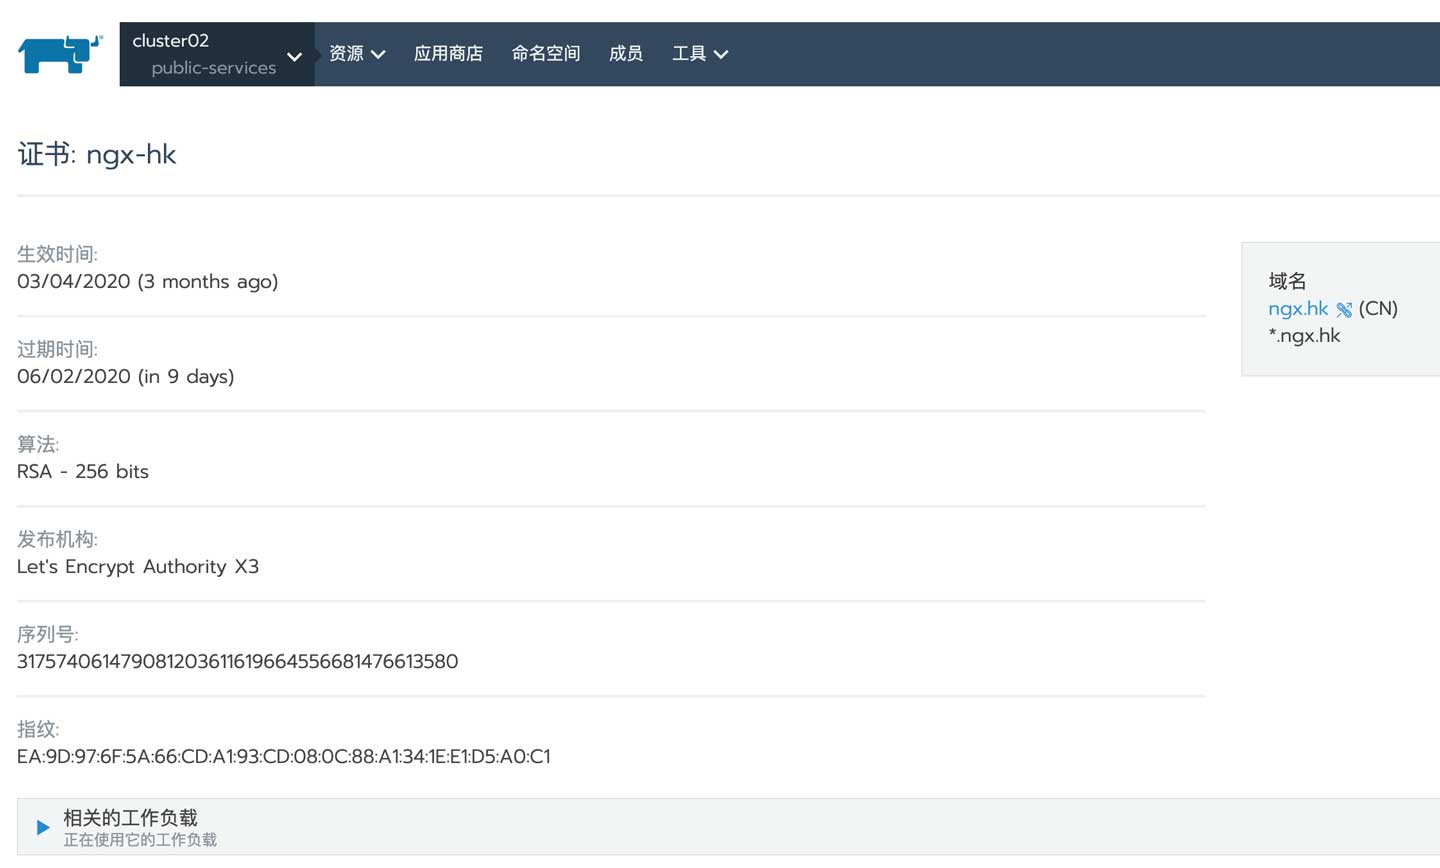
Rancher2目前只支持七层负载均衡,如果需要对外提供HTTPS服务,建议配置数字证书。首先来到数字证书的配置界面:
然后根据实际情况填写即可,请切记需要将证书的证书链补全,不要缺少中级证书:
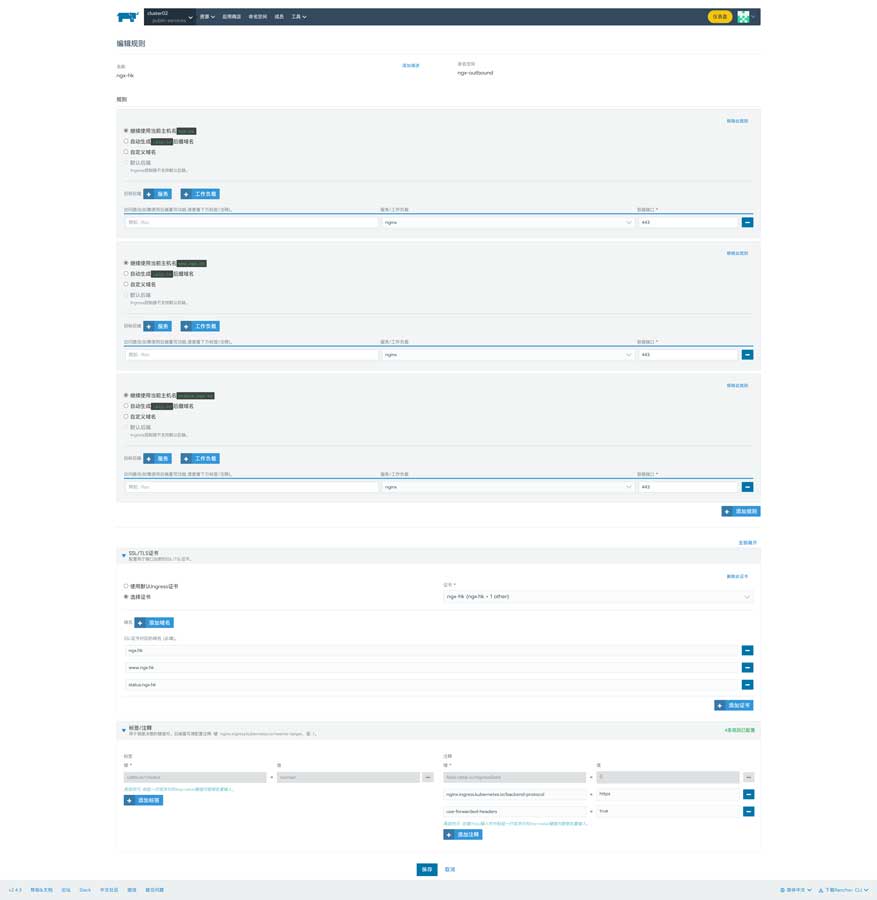
然后回到负载均衡配置的页面,添加规则:
配置内容如下:
在底部有一个叫注释的部分,这可以配置一些nginx的属性,比如上图中的:
# 指定后端协议
nginx.ingress.kubernetes.io/backend-protocol: https

# 使用X-Forwarded-*向后端传递IP
use-forwarded-headers: true
所有键值对可以在以下地址中找到:
至此,所有配置均已完成。
0x06 结语
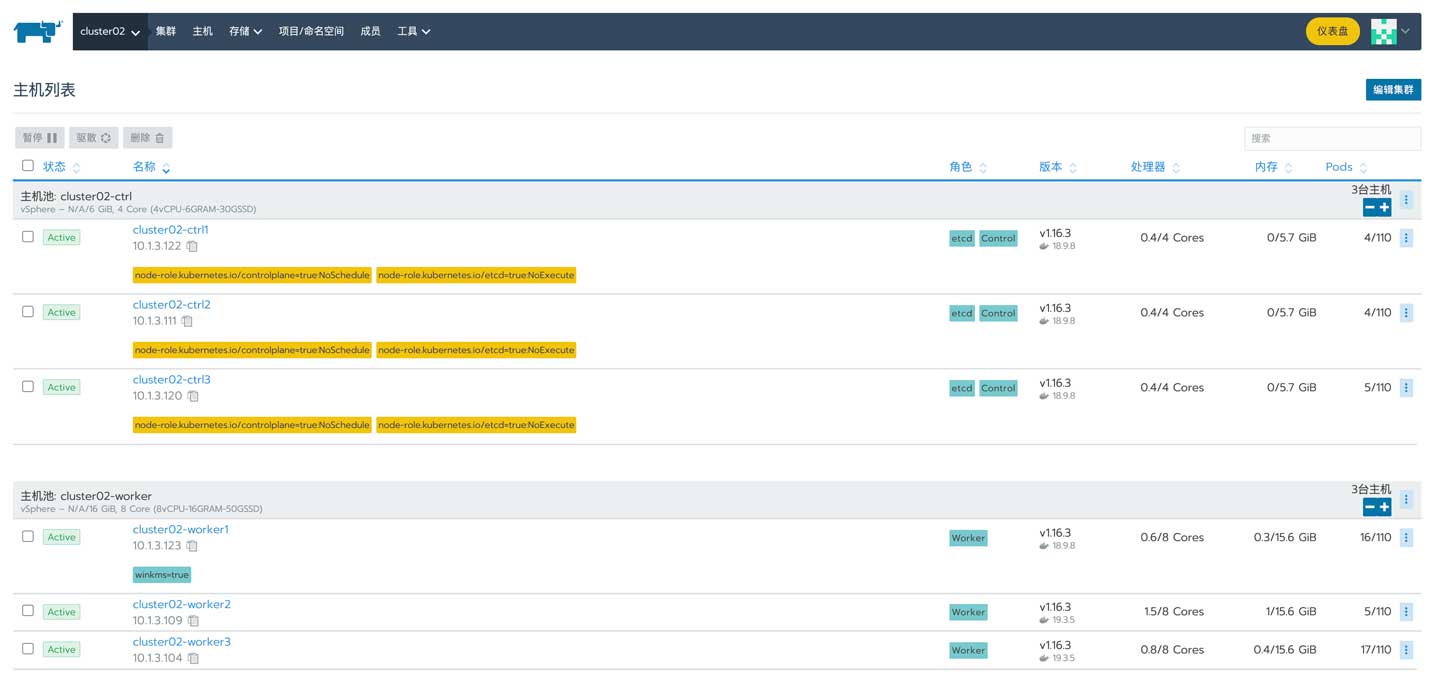
其实还有DNS解析的部分,使用worker节点的IP也是可以访问的。这里需要分为两种情况:
- pod提供tcp或udp连接:使用master或worker的IP皆可
- pod提供http或https服务:只能使用worker的IP
那么为了实现高可用,可以调用Rancher的API获取指定集群的所有worker IP,并自动配置外部的SLB服务以实现高可用。
本文中所描述的主要对外提供http与https服务,所以需要使用worker的IP:
