0x01 前言
TLSv1.3在很久以前就已经起草,直至最近,IETF已经确认了正式版草案,根据计划,将在4月5日发布正式版。
在此之前,Firefox与Chrome已经使用支持Openssl draft 23的中间件启用TLSv1.3。所以在一周以前,我重新编译nginx,提前启用TLSv1.3。
其实nginx从1.13.0开始就已经支持TLSv1.3,但是主流的浏览器还不能自动启用TLSv1.3,所以我一直都没有把这个协议加上,直至上周,我终于动手了。
0x02 准备
因为我应用环境的需要,所以我需要下载以下源码:
- lua-nginx-module:用于支持lua模块
- nginx-ct:启用证书透明度
- openssl-1.1.1-pre2:用于启用TLSv1.3
- ModSecurity:用于编译ModSecurity
- ModSecurity-nginx:用于连接ModSecurity与nignx
这里有个要注意的点,目前最新的openssl版本为: openssl-1.1.1-pre3,这个版本的openssl对应draft 26,而我们需要draft 23,对应的openssl版本为 openssl-1.1.1-pre2。旧版本的openssl可以从以下地址下载:
首先建立临时文件夹并下载相关文件:
#新建文件夹
[root@web-dev ~]# mkdir -p /root/codex/nginx

#进入文件夹
[root@web-dev ~]# cd codex/nginx/

#下载lua-nginx-module
[root@web-dev nginx]# git clone https://github.com/openresty/lua-nginx-module.git

#下载nginx-ct
[root@web-dev nginx]# git clone https://github.com/grahamedgecombe/nginx-ct.git

#下载openssl
[root@web-dev nginx]# wget https://www.openssl.org/source/old/1.1.1/openssl-1.1.1-pre2.tar.gz

#下载ModSecurity
[root@web-dev nginx]# git clone --depth 1 -b v3/master --single-branch https://github.com/SpiderLabs/ModSecurity

#下载ModSecurity-nginx
[root@web-dev nginx]# git clone --depth 1 https://github.com/SpiderLabs/ModSecurity-nginx.git
然后,还得下载nginx:
[root@web-dev nginx]# wget https://nginx.org/download/nginx-1.13.10.tar.gz
最后解压被压缩的软件:
#解压并删除nginx压缩包
[root@web-dev nginx]# tar zxvf nginx-1.13.10.tar.gz && rm -f nginx-1.13.10.tar.gz

#解压并删除openssl压缩包
[root@web-dev nginx]# tar zxvf openssl-1.1.1-pre2.tar.gz && rm -f openssl-1.1.1-pre2.tar.gz
最终,该目录下会有这些文件夹:
[root@web-dev nginx]# ll
总用量 20
drwxr-xr-x 11 root root 4096 4月   1 17:18 lua-nginx-module
drwxr-xr-x 12 root root 4096 4月   1 17:14 ModSecurity
drwxr-xr-x  5 root root 4096 4月   1 17:14 ModSecurity-nginx
drwxr-xr-x  8 1001 1001  147 3月  20 23:58 nginx-1.13.10
drwxr-xr-x  3 root root 4096 4月   1 17:11 nginx-ct
drwxr-xr-x 19 root root 4096 2月  27 21:40 openssl-1.1.1-pre2
0x03 编译安装
如果不需要ModSecurity,那么可以跳过ModSecurity的部分,如果需要一起编译,那么请参考以下文章中“0x03.1 Modsecurity Lib”的部分,先准备好ModSecurity,再编译nignx:
如果不想看那么长的文章,也可以直接运行以下命令:
#进入相关目录
[root@web-dev ModSecurity]# cd /root/codex/nginx/ModSecurity

#初始化submodule
[root@web-dev ModSecurity]# git submodule init

#更新submodule
[root@web-dev ModSecurity]#  git submodule update

#运行build.sh
[root@web-dev ModSecurity]# ./build.sh

#configure
[root@web-dev ModSecurity]# ./configure

#编译
[root@web-dev ModSecurity]# make

#安装
[root@web-dev ModSecurity]# make install
完成ModSecurity的编译安装后就可以准备nignx的编译参数了:
./configure --prefix=/usr/local/nginx --sbin-path=/usr/sbin/nginx --conf-path=/usr/local/nginx/nginx.conf --pid-path=/var/run/nginx.pid --error-log-path=/var/log/nginx/error.log --http-log-path=/var/log/nginx/access.log --lock-path=/var/lock/nginx.lock --with-http_gunzip_module --with-pcre --with-pcre-jit --with-http_perl_module --with-ld-opt="-Wl,-E" --with-http_realip_module --with-http_secure_link_module --with-http_slice_module --with-http_ssl_module --with-http_stub_status_module --with-http_sub_module --with-http_v2_module --with-http_addition_module --with-http_xslt_module --with-http_image_filter_module --with-http_geoip_module --with-http_dav_module --with-http_flv_module --with-http_mp4_module --with-http_gzip_static_module --with-http_auth_request_module --with-http_random_index_module --with-select_module --with-poll_module --with-file-aio --with-http_degradation_module --with-libatomic --http-client-body-temp-path=/var/tmp/nginx/client_body --http-proxy-temp-path=/var/tmp/nginx/proxy --http-fastcgi-temp-path=/var/tmp/nginx/fastcgi --http-uwsgi-temp-path=/var/tmp/nginx/uwsgi --http-scgi-temp-path=/var/tmp/nginx/scgi --add-dynamic-module=../ModSecurity-nginx/ --add-module=../lua-nginx-module --add-module=../nginx-ct/ --with-openssl=../openssl-1.1.1-pre2/
在开始编译之前,需要修改OpenSSL的一个文件,这是一个已知的BUG,而且在新版的OpenSSL中已经修复。打开以下文件并修改:
#打开文件
[root@web-dev nginx-1.13.10]# vim /root/codex/nginx/openssl-1.1.1-pre2/crypto/ec/asm/x25519-x86_64.pl

#删除最后一行中的变量符号
close STDOUT;
然后进入nginx源码的文件夹进行编译操作:
#进入文件夹
[root@web-dev ~]# cd /root/codex/nginx/nginx-1.13.10/

#configure
[root@web-dev nginx-1.13.10]# ./configure --prefix=/usr/local/nginx --sbin-path=/usr/sbin/nginx --conf-path=/usr/local/nginx/nginx.conf --pid-path=/var/run/nginx.pid --error-log-path=/var/log/nginx/error.log --http-log-path=/var/log/nginx/access.log --lock-path=/var/lock/nginx.lock --with-http_gunzip_module --with-pcre --with-pcre-jit --with-http_perl_module --with-ld-opt="-Wl,-E" --with-http_realip_module --with-http_secure_link_module --with-http_slice_module --with-http_ssl_module --with-http_stub_status_module --with-http_sub_module --with-http_v2_module --with-http_addition_module --with-http_xslt_module --with-http_image_filter_module --with-http_geoip_module --with-http_dav_module --with-http_flv_module --with-http_mp4_module --with-http_gzip_static_module --with-http_auth_request_module --with-http_random_index_module --with-select_module --with-poll_module --with-file-aio --with-http_degradation_module --with-libatomic --http-client-body-temp-path=/var/tmp/nginx/client_body --http-proxy-temp-path=/var/tmp/nginx/proxy --http-fastcgi-temp-path=/var/tmp/nginx/fastcgi --http-uwsgi-temp-path=/var/tmp/nginx/uwsgi --http-scgi-temp-path=/var/tmp/nginx/scgi --add-dynamic-module=../ModSecurity-nginx/ --add-module=../lua-nginx-module --add-module=../nginx-ct/ --with-openssl=../openssl-1.1.1-pre2/

#编译
[root@web-dev nginx-1.13.10]# make

#安装
[root@web-dev nginx-1.13.10]# make install
因为自定义了OpenSSL版本,所以编译的时间会比较长,需耐心等待。
完成后即可通过以下命令查看nginx的相关信息:
[root@web-dev nginx-1.13.10]# nginx -V
nginx version: nginx/1.13.10
built by gcc 4.8.5 20150623 (Red Hat 4.8.5-16) (GCC)
built with OpenSSL 1.1.1-pre2 (alpha) 27 Feb 2018
TLS SNI support enabled
configure arguments: --prefix=/usr/local/nginx --sbin-path=/usr/sbin/nginx --conf-path=/usr/local/nginx/nginx.conf --pid-path=/var/run/nginx.pid --error-log-path=/var/log/nginx/error.log --http-log-path=/var/log/nginx/access.log --lock-path=/var/lock/nginx.lock --with-http_gunzip_module --with-pcre --with-pcre-jit --with-http_perl_module --with-ld-opt=-Wl,-E --with-http_realip_module --with-http_secure_link_module --with-http_slice_module --with-http_ssl_module --with-http_stub_status_module --with-http_sub_module --with-http_v2_module --with-http_addition_module --with-http_xslt_module --with-http_image_filter_module --with-http_geoip_module --with-http_dav_module --with-http_flv_module --with-http_mp4_module --with-http_gzip_static_module --with-http_auth_request_module --with-http_random_index_module --with-select_module --with-poll_module --with-file-aio --with-http_degradation_module --with-libatomic --http-client-body-temp-path=/var/tmp/nginx/client_body --http-proxy-temp-path=/var/tmp/nginx/proxy --http-fastcgi-temp-path=/var/tmp/nginx/fastcgi --http-uwsgi-temp-path=/var/tmp/nginx/uwsgi --http-scgi-temp-path=/var/tmp/nginx/scgi --add-dynamic-module=../ModSecurity-nginx/ --add-module=../lua-nginx-module --add-module=../nginx-ct/ --with-openssl=../openssl-1.1.1-pre2/
0x04 配置
在启动nginx之前我们需要对站点的配置文件稍作改动。
因为TLSv1.3新加入了几个算法,所以需要添加到nginx的配置文件中:
- TLS13-AES-256-GCM-SHA384
- TLS13-CHACHA20-POLY1305-SHA256
- TLS13-AES-128-GCM-SHA256
- TLS13-AES-128-CCM-8-SHA256
- TLS13-AES-128-CCM-SHA256
因为我的站点不计划支持旧设备,所以目前只支持TLSv1.2与TLSv1.3。如果你的业务需要支持旧的设备,那么请注意选择加密算法,以下为我站点所使用的算法:
TLS13-AES-256-GCM-SHA384:TLS13-CHACHA20-POLY1305-SHA256:TLS13-AES-128-GCM-SHA256:TLS13-AES-128-CCM-8-SHA256:TLS13-AES-128-CCM-SHA256:ECDHE-ECDSA-AES256-GCM-SHA384:ECDHE-RSA-AES256-GCM-SHA384:ECDHE-ECDSA-CHACHA20-POLY1305:ECDHE-RSA-CHACHA20-POLY1305:ECDHE-ECDSA-AES128-GCM-SHA256:ECDHE-RSA-AES128-GCM-SHA256:ECDHE-ECDSA-AES256-SHA384:ECDHE-RSA-AES256-SHA384:ECDHE-ECDSA-AES128-SHA256:ECDHE-RSA-AES128-SHA256
然后配置协议:
ssl_protocols TLSv1.2 TLSv1.3;
其他的配置信息可以参考以下文章:
0x05 测试
在我写这篇文章的时候,最新版本的chrome与Firefox已经默认启用对OpenSSL draft 23的支持,所以并不需要手动修改浏览器的配置。
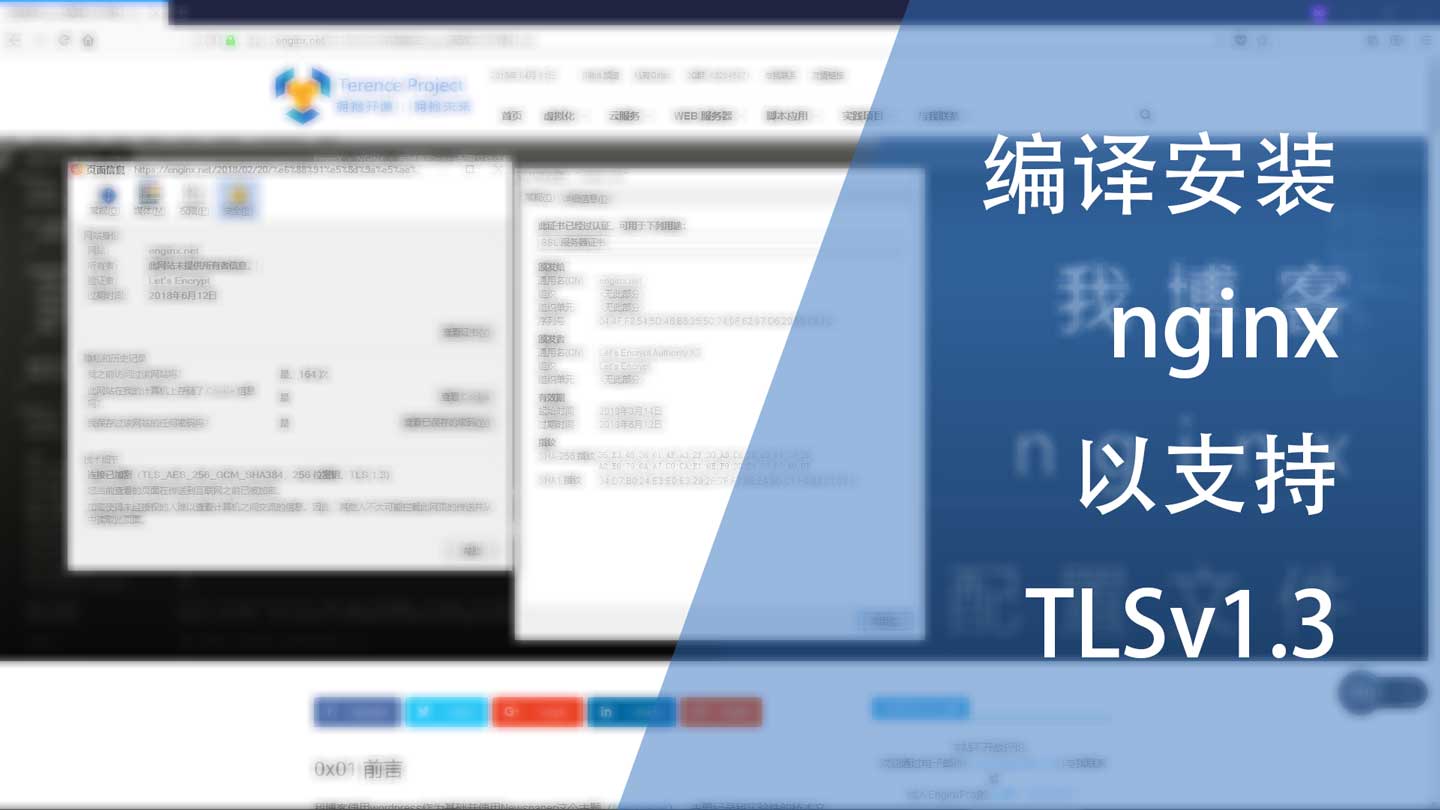
打开chrome的控制台,选择security标签,再打开测试用的站点,就可以看到所使用的协议:

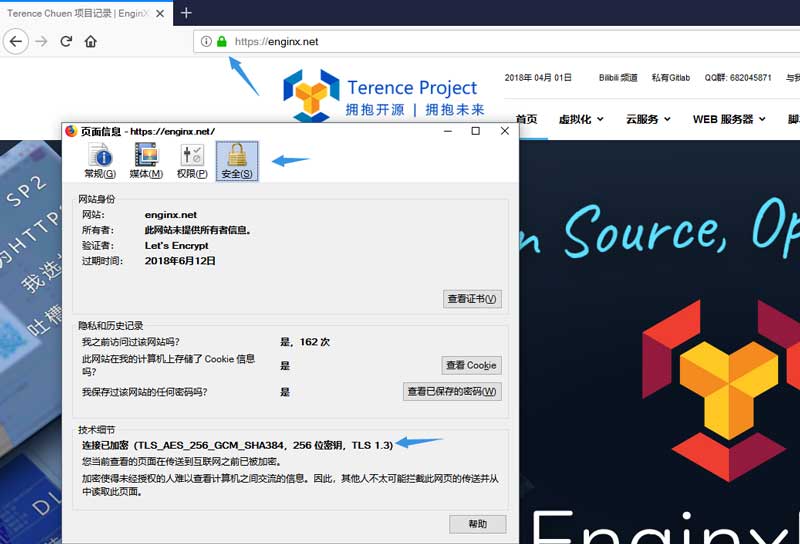
至于Firefox,打开站点后点击地址栏上的小锁,然后点击“显示连接细节”,最后单击“更多信息”即可看到所使用的协议:
因为能力所限,我并没有测试其他浏览器,如果有需要,请自行测试。
0x06 结语
还有几天,正式版的OpenSSL就要发布了,同时各主流的浏览器也将逐步更新,加入对TLSv1.3的支持。不过对于终端用户来说并没有什么感觉,但我们需要特别关注浏览器对这个协议的兼容性。


